Hit and Mostly Miss

Lots happening in the shed, translating to not much happening on this blog.  First off, the Fulvia has been occupying me with a small fault but has turned into a huge production.

I thought the car was missing at light throttle openings like cruising down the freeway so as I was going to change over to electronic ignition anyway this was the first of many things that I replaced and it made no difference so here is a list of what was checked or replaced:

Sparkplugs replaced
Plug leads checked
Distributor Cap substituted (Thanks Garry)
Rotor replaced
Ignition Timing checked
Carburettor Float Level checked/corrected (Thanks Marnix)
Fuel pump pressure checked
fuel lines checked
Fuel tank venting checked
Carburettor Balance checked/corrected
Idle Mixture checked/corrected
Loose venturis fixed
Valve Clearances checked
Valve spring pressure checked

The alleged culprit

All these adjustments resulted in no change.  It was suggested by a certain Mr Bondini that “Are you sure it’s not the nut behind the wheel?” a comment that as it happened was very close to the truth.  I was having my doubts, was it really a miss?  I had been pouring out this tale of woe on a Fulvia forum when it was postulated that maybe my engine mounts were shot, making the engine wobbly so appearing to be a miss and that sounded about right, new mounts are ordered we will see.


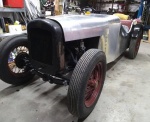
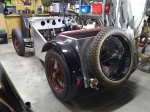
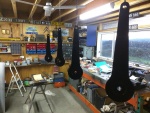
The Futile Fulvia Fiasco has kept me away from the Austin 7 Special for too long but I’m back on it.  Last time I checked in the Austin was a rolling chassis, now it’s a rolling running chassis with most of the body complete see below, the timeline for the project is to be completed by December although I think that was originally December 2017, never mind I had better get my skates on.

The Austin 7 as purchased was a heap of junk, the only redeeming feature was its photo in the advertisement, the actual car was rubbish.  The process so far has been to replace or recondition everything.

In summary

Differential: renew everything except the case
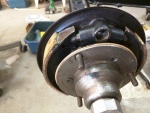
Brakes: replace dodgy leaking hydraulic conversion with “Semi Girling” shoes and backing plates and replace drums with cast iron ones, new cables etc.
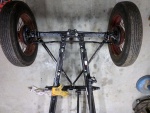
Front axle: Replace with lowered one, new kingpins, sexy double shockers renew all swivels.
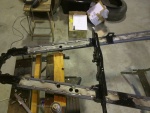
Chassis: Box in Top hat section, sandblast and paint.
Gearbox: now close ratio
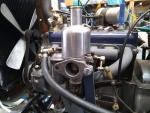
Engine… seems good?
Body frame reshaped to look less like a “Ute”, seat moved back 125mm so I can now fit.
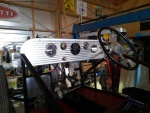
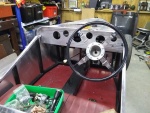
Dashboard: Machine turned, new fake Ulster instruments Tacho and 100mph Speedo!

For the body I have gone for the bare aluminium riveted look, initially thinking aviation but the more I look at the finished product the more I think a tank sans gun turret, Oh well I guess I will not notice once I am actually driving it.

bbblbbbr
resized_IMG_20180605_151430410.jpg
resized_IMG_20180609_123718757.jpg
resized_IMG_20180620_174136848.jpg
resized_IMG_20180720_125712164.jpg
resized_IMG_20180720_125745071.jpg
resized_IMG_20180720_125753541.jpg
resized_IMG_20161017_183138.jpg
resized_IMG_20161024_102014.jpg
resized_IMG_20170715_145628.jpg
resized_IMG_20170816_193022.jpg
resized_IMG_20170818_143635.jpg
resized_IMG_20170827_111338.jpg
resized_IMG_20170827_145446.jpg
resized_IMG_20170829_175640.jpg
resized_IMG_20170830_201615.jpg
resized_IMG_20180519_172253992.jpg
resized_IMG_20180605_151430410.jpg
resized_IMG_20180609_123718757.jpg
resized_IMG_20180620_174136848.jpg
resized_IMG_20180720_125712164.jpg
resized_IMG_20180720_125745071.jpg
resized_IMG_20180720_125753541.jpg
resized_IMG_20161017_183138.jpg
resized_IMG_20161024_102014.jpg
resized_IMG_20170715_145628.jpg
resized_IMG_20170816_193022.jpg
resized_IMG_20170818_143635.jpg
resized_IMG_20170827_111338.jpg


The Good Oil on Castor or Caster Measurement

The Austin’s suspension is somewhat lower than standard so the castor angle probably needed a tweek but how to measure it?  Initially I thought I would use some flat surface on the axle or the stub axles but are those surfaces perpendicular to the king pins?

So, after a little Googling I found another use for the bevel box (Digital Level) and I think it would make a pretty good excuse to buy one if you have not already.

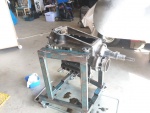
The jist of it is with the wheels straight ahead and sitting on a level surface, place the level on something vertical (it’s magnetic) as in the picture and zero it.  Turn the wheel 20° right and record the result then go back to straight ahead and go left 20° and record that number, in my case it was 1.3° for right and 1.2° for left so to calculate the castor it was 1.3 + 1.2 =2.5 then here is the magic part x 1.5 = 3.75°

Evidently, it’s important that the wheels are moved only 20° each way and that it’s related to the 1.5 that you multiply the result.  I will have to go ask a Maths teacher (Ian?) as my brain hurts when I try to do the trig.

20° lines drawn on the floor the White wedge is a piece of wood cut at 20° on the drop saw and used as a template

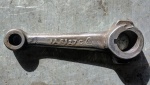
A7 chassis with one radius arm in place, I needed a 4° wedge to go under the spring to get the castor right then the radius rod needed some work to match.

Sevens Unite

My new year’s resolution of getting an Austin on the road by December is looking less likely as I didn’t realise the impact of cold weather on my productivity, never mind it will happen just not by December

The Special’s LWB A7 Chassis

All the chassis parts for the A7 Special have now arrived so the now rustless Chummy will take a breather.  There is a rolling chassis where before there was a pile junk, some would say I now have a rolling pile of junk.

There are three things on an Austin Seven that could be seen as drawbacks, low power, poor brakes and a tendency the fall over when cornered.  I like thousands before me are going to have a crack at eliminating most of these on the Special and lessen them on the Chummy.

Difference between original and flattened rear spring

First off, the rear quarter elliptics have been flattened this lowers the car but also stops the rear steering that comes with the spring’s effective length changing as you corner.  The front suspension also now sports a flattened spring, a bowed axle and separate shockers, all these changes (except the shocks) mess up the caster angle so I’m waiting for some lowered ends that will be attached to the radius rods that in turn may have to be shortened but before that I need to install the engine and gearbox to see what their weight does to the whole equation.

While I am waiting for that to happen I’m coming to grips with the brakes which had been converted to hydraulic in such a way that the chance of stopping would have been purely accidental.  Needless to say, they have been consigned to the ever-growing scrap heap and replacement late model “Semi Girling” mechanical units installed.  These improved brakes were supposed to cope with the later model Austin 7’s which were quite heavy so on the Special they should be good?  Better? We will see.

Any student of Bugatti or Lancia mechanical brakes will be bemused by the terrible geometry of the Austin brake system but given that it was only Herbert and his young offsider that designed the car in a very short time it is a remarkable job for it’s day, however given its long production run you would have thought that a little more “design” could have crept into the braking system over its life.

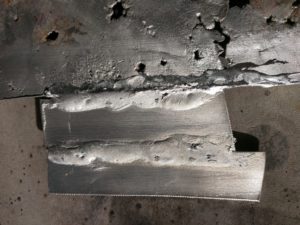
Corroded scrap from A7 brazed to a new strip brazed to another new strip

On another subject, I have been at many car shows and have often seen people demonstrating welding aluminium on old Coke cans and have always been tempted to buy the product but thought it was all down to the skill of the operator.  The chummy has some aluminium panel damage so I have bought some of these magic brazing rods from eBay, the stuff works because it melts at around 370° and Aluminium melts at around 600° so it can be done without blowing holes, they claim it’s stronger than the aluminium also you can do it with propane or Map gas.  The picture shows my first attempt so I will need some practice before the main gig.