How to find your Diff ratio with a GPS

From the previous post you may have noticed the dead bike speedo.   I have ordered a replacement VDO A4 and while on the website a Garmin GPS based bike speedo as well, thinking the VDO can just work as an odometer as its always on whereas the GPS one can be mounted on the steering wheel  where it can be seen but needs to be charged before use and is more likely stolen so may only be available intermittently.

I will just backup a bit.  The VDO speedo has a wire to a sensor that on a bike would be mounted on the front forks so it can sense a magnet wizzing past attached to the spokes therefore counting wheel revs, you tell it what the wheel circumference is and it works out how fast you are going. So far so good.

To cut a long story short mounting it like on a bike was not going to work so I stuck the magnet on the tail shaft flange instead.   So with a wheel circumference of 2360mm and a diff ratio of about  4:1 the “virtual” wheel diameter would be 2360/4=590mm, most bike speedos do not go below 1000mm however the VDO does so all should be good.

Took the car out for a test with both speedos and the VDO reads fast so after many stops each time lowering the circumference figure in the speedo eventually I have accuracy at 525mm, so a diff ratio of 2360/525=4.5:1. I have now gone through the paper work for the car and sure enough it has a 12/54 ratio of you guessed it 4.5:1 the usual ratio for a Type 37 is 14/54 or 3.86:1.

So brings me to the Tachometer, on the Bug it runs from a pulley on the end of the camshaft via a flat belt to another pulley .  At 100kph it should be indicating about 3200rpm with my new found gearing… however at 3000 I was passing everyone.  I had reservations about the engine’s ability to rev I now realise I should have had reservations about the Tacho’s ability to indicate those revs.

The wheels.  Luckily with the hub fitment problems, I have not ordered the wheels, imagine how much it would rev with smaller wheels on the back.  So all this maths has saved me money, only two wheels and two tyres needed for the T37 Hotrod.

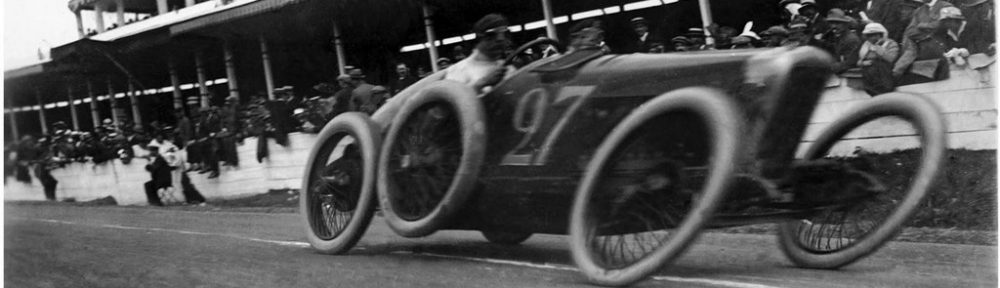
Quite unrelated to any of the above we went to Noojee for lunch today going the long and interesting way through some of the best country in Victoria.  On the way back I had the opportunity to drive Des Dillon’s Alfonso Hispano Suiza which is sans just about any bodywork so goes quite unlike most Edwardian cars that is to say this one goes, stops and handles.  If I had a garage that would only fit one car, this would have to be it.
 

Win some lose some

Hot one today so slothful enterprises only.

Received in the mail today a wheel centre for the Bug from Peter from Richards Bros Cardiff, Wales.  Peter was worried that the wire wheels I have ordered may not fit so decided to send out a centre for a trial fit and he was half right, the fronts are OK the rears are too tight a fit on my splines.  So I could:

  1. Put the new 2.5″ (narrow) wheels on the front and leave to old 4″ (fatties) on the back for the hotrod look.
  2. Send the rear splines to Richards Bros. to get machined to fit the wheels.
  3.  Don’t do anything for now and save up for some alloy blade wheels?  Bugatti’s do look good with those wheels…….

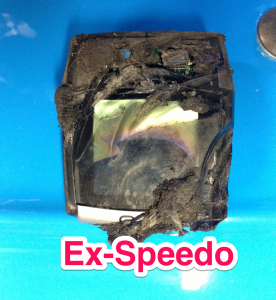
While on the Bugatti, I took it out on a local club  “Cento Miglia” Economy Run and achieved 30MPG which is exactly what Ettore said it would do, very prescient of him.  Also I noticed that my VDO Car/Bike speedo seemed to be missing, I immediately thought this was some sort Franco/German problem, however really it appeared to coincide with a grinding- rubbing noise, unfortunately it had fallen into a gap between the seat and the alternator pulley guard, photo attached.

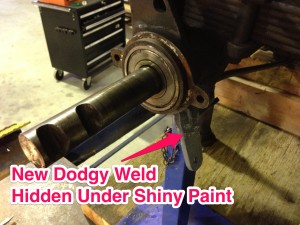
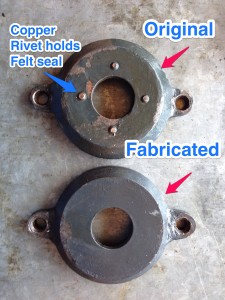
The Sizaire now has modern seals in the rear hubs after I discovered the RH housing was a recent fabrication so it did not seem so bad machining the centre out to put seals in.  I have also welded a replacement bracket on the RHS brakes, hopefully a better weld than the Blu-tack previously applied. The bracket is not absolutely necessary for retardation ….. in a forward direction anyway.

Lastly sorry about all the arrows and captions in the photos as I’ve just discovered the “Skitch”  app on my iphone.
IMG_2750 IMG_2751 IMG_2752IMG_1769

Sink or Swim

Happy new year, at last the blackberries and the grass are in retreat so the shed beckons once more, so today I thought it was time to tempt the Sizaire out of the shed where she has been malingering on the pretext that carrying a couple of middle aged blokes across Australia was quite enough for a 100 year old, however that was last year so time to be a beast of burden once more.

If you have been reading my previous posts you would know that I have had no luck getting the Siz to start or run very well and I have been trying all sorts of stuff to remedy this without success. Today that all changed even though it has been said by some “that most fuel problems are really ignition problems” in this case it really was fuel and when you have a carby as simple as the Siz what can go wrong? The float weighed in at 64g, after I drilled a hole in it and emptied the fuel out and soldered it up again it weighed 51g so more submarine than float.

I went out for a run and the Siz is running beautifully although that made another problem more apparent as pulling on the brake lever did not really have the desired effect.  Up on the hoist revealed that part of the braking system must have fallen off somewhere between Perth and Sydney due to a dodgy weld also the left hand wheel bearing seal was chewed out so LH  brake shoes were coated in 250W oil, I suppose the trip was more about going than stopping.

Andrew and Geoff have put modern seals on their Sizaires so I should probably do the same although the felt seal on the RH side is still doing a stirling job but where to get felt?

IMG_1716b IMG_1719b